Monday, March 31, 2014

Muse 60

I have a last minute entry to Muse #60.  Lyndal Higgins, our Muse this week is a genius putting these shades together.  I am just wowed by her card.

Muse #60 Lyndal Higgins
I so fell in love with the inked colors and knew immediately that I wanted a white glittered piece in front of a similarly inked background piece.  I finally found some time to sit down and get the card made.  I used distress inks in crushed olive, squeezed lemonade, mustard seed, faded jeans, salty ocean, and black soot.

I cut a Simon Says Stamp Fresh Daisies and ran it through my xyron upside down.  Then added clear rock candy distress glitter. I burnished the glitter so it would stay put, then placed the die on my inked background.  A gold embossed sentiment on vellum finished off my card. Thanks so much for stopping by.

Saturday, March 29, 2014

The Card Concept #6

I have a clean and simple card for The Card Concept challenge, I would almost call it clean and graphic, but the sentiment is too curvy.

My card uses all Hero Arts Stamps- Sweet Threads and Messages with Flourish, inks are Pale Tomato and Tide Pool. Card stock is Neenah Aspen White. Card Size 4.25 by 4.25 inches. I love the sweet threads stamp, it almost looks as if there are three tiers of petals as you look down from the top.

I was struck by the large coral colored flower and the small teal one just to the side. I love those colors together.

 Challenge is open until noon March 31, 2014 Pacific Daylight Time.

Thanks for stopping by.

Friday, March 28, 2014

Card Chain Challenge for March

I signed up to send my March card to Deborah, the owner of the card chain challenge.  Now we participants send her a photo of our cards each month before we mail them to their recipients.  I was a bad girl, I sent Deborah a sneak peek of her card, and wanted to wait a bit before sending the whole picture. I wanted her to also experience the surprise and anticipation of receiving an unknown card.

I hope she likes the card.  I went with the option of using a stencil.  I covered it with embossing paste, and put some rose gold glitter on the leaves.  I then heated it.  After it had cooled, I covered it with versamark and some clear embossing powder...some of the rose gold glitter escaped, and flecked the whole card.  At first I was dismayed...but after looking at it a few minutes, I actually loved the look. I clear embossed it a few more times, and it has the look of a glazed tile with the raised leaves.  I "framed" this with a piece of embossed cardstock secured with foam tape and added some pre-made  recollection roses and seam binding ribbon to the corner.

Thanks so much for stopping by!

Tuesday, March 25, 2014

Happy Birthday

A birthday card for a blogging friend, whom I "met" through the Hero Arts Flickr group. Happy Birthday!
The card front and part of the interior were sponged with Spiced Marmalade and Worn Lipstick distress inks. I used paper from the Simon Says Stamp Feb Card kit, as well as the flower stamp from the Thinking of You stamp set included in the kit. The sentiment is Simon Says Stamp Happy Every Day stamp set.

Thanks for stopping by.

Monday, March 24, 2014

Navy and Teal

Saturday, I was able to play in my favorite Scramble over at the Hero Arts Flickr group. Debbie gave us a challenge to use only Navy and Teal including any embellishments, inks, papers etc in addition to neutrals White, Kraft and Black. The usual 90 minutes to create, photograph and upload to the group.

I am getting slower and slower at these, I seem to take almost the whole time with 1 card, while a few other ladies seem to get 2 or more done.

Supplies: Stampin Up -Designer Series Paper, Cardstock, Ruffle Ribbon all in Coastal Cabana
Hero Arts-Navy Shadow Ink, Mint Julep Shadow Ink, Pearls and Gems-Sea Mixed, Tall Flowers, Messages with Flourish, Envelope Liner Stamp, white embossing powder
Versamark Ink

Thanks for stopping by!

Sunday, March 23, 2014

Hello Rainbow


I have really been enjoying the challenges over at Muse.  This week's challenge might be one of my favorites. I love color.  When I looked at it, I immediately though rainbow. Now I realize not all the colors are there, but I had a quirky idea.  That's how I got to this card:
I used the Simon Says stamp rainbow stencil, with embossing paste, dumped rock candy dry glitter on it and actually LET IT DRY OVERNIGHT!  I am usually far too impatient for that. I cut strips of colors similar to Marion's card and then die cut my "hello" with MFT's Highrise Uppercase Alpha dies. I stacked them 5 layers thick, then added Wink of Stella in clear, and topped it all off with a coating of glossy accents.

Here is Marion Vagg's fantastic inspiration card.

Thanks for stopping by.  There is still time to play in this challenge, it closes Monday at 8 am eastern US time.

Saturday, March 22, 2014

Tele-Crafting

I started crafting as a scrap book maker, and added card making about 3 years ago. One of the things I miss terribly about not living in California anymore is my monthly Scrap Night with my girlfriend.  We would meet at an LSS that was equidistant between our homes and scrapbook. It never was necessarily a chatty night, but one of companionship and shared interests without interruptions.

Friday night, I got a text from her, and she was at the LSS scrap-booking by herself. She had sent me pictures of her first layout.  Hubs was working, and I wanted to play with one of the Simon Says Card Kits that hadn't been used much.  So I went to it.  We kept in touch by phone and text- sending pictures back and forth for about  3 and a half hours. It was almost like having a scrap night again. I had such a good time.

Here are my cards for the night. All materials used are from the February 2014 Simon Says Stamp Card Kit. I also used Versamark, white embossing powder, 1 scrap of pink cs, some sequins, and some Hero Arts shadow ink in Bubblegum and Distress Inks in Worn Lipstick, Spiced Marmelade, and Peeled Paint and 1 extra sheet of Neenah Aspen White cardstock for a card base.


Thanks for stopping by!

Friday, March 21, 2014

Happy Birthday in Coastal Cabana

A friend of mine is having a birthday and I wanted to send a card. She is a Stampin Up demonstrator so it is always a decision to go with Stampin Up products or not for her card.  This is the first time I am using Stampin Up products for her card, I hope she is happily surprised.


She had mentioned recently that she loves the new Coastal Cabana color, and I love a monochromatic card.
I am adding this to the Shopping Our Stash #143 Buttons and Bows Challenge.

Thanks for stopping by!

Supplies:
Distress Watercolor Paper, Neenah Aspen White 110# CS, Stazon Black Ink, A scrap of lace, some DMC string/thread. Faber-Castel Waterbrush, Glue Dots, Tombo Stamp Runner, Glossy Accents
Stampin Up - Stamps- Curly Cute, Fifth Avenue Florals; Designer Series Paper, Cardstock,  & Ink in Coastal Cabana, Ribbons and Button in Pool Party, Dimensionals.

Thursday, March 20, 2014

Day 10 ...already? Boo

Here is my homework for day 10, I chose to make the inked mosaic look with an overlay of clear embossing powder, I probably should have left my masking strips on so that the mosaics would be raised...hence the "texture" part of the lesson.  Next time...maybe.

I couldn't resist using the Simon Says Stamp You set.  I use this saying often!

I am anticipating spring, as my color choices show. I used Brilliance Pearlescent Inks in Sky Blue, Lime, Yellow, and Coral. Today we had 60 degree temps in southern Maryland, I went out on errands WITHOUT A JACKET! Whoo Hooo is spring coming?  Sadly not so soon. (Snow forecast for Monday AGAIN!) I am waiting for those cherry blossoms to bloom.

Thanks for stopping by!

http://www.onlinecardclasses.com/CS3/wp-content/uploads/2014/02/CS3_paticipant.png

Day 9 Homework

Since I have a few embossing diffusers from Darice and now solid backed shape dies I created a simple embossed card with a smooth oval center. The sentiment is the star of this card.  Julie Ebersole showed this technique and reminded me how lovely and rich is Delicata's Golden Glitz pigment ink,

I placed my cardstock into the embossing folder, closed it and then placed the diffuser on top. I ran it through my cuttlebug, and after it was embossed, I placed the diffuser over the embossed piece and ran a stylus around the oval opening, to help set it off a bit from the other embossed areas.

I used Wink of Stella pens (not brush markers) to color in some of the slanted rectangles; I wanted them to appear a bit like confetti raining down ( I might have gone a bit overboard).  I stamped the big greeting with the Golden Glitz ink, this stamp is form SSS's Happy Every Day set. Every time I see it used I think why don't I have that set.  I bought it recently, and this is my first inking. I was please to see it fit perfectly into the oval space the diffuser created.


Below is a close up, odd the colored bits are the debossed parts, funny how in the photo it looks just the opposite.
Thanks for stopping by.

Tuesday, March 18, 2014

Simple Coloring on Watercolor Paper

My second homework card for OCC's Clean and Simple 3, follows the example by Donna Mikasa. She provided a very easy to follow tutorial for drawing/coloring freehand flowers and leaves with a bold sentiment. My leaves need work, but for a first attempt it is acceptable.


Than ks so much for stopping by!

Simple Copic Coloring - Vellum

Hi I am back with some more homework from Clean and Simple 3 at Online Card Classes.  The dies used are from My Favorite Things and Paper Smooches. Coloring done by Copic Markers.

I chose to follow Kristina Werner's die cut and vellum coloring example.  The trick to make the colors pop, is adding a sheet of white behind the vellum, it changes it from a soft color to a deep color.

I have a second post coming up right after this.
Thanks for stopping by.

Sunday, March 16, 2014

A little time for play

This Sunday afternoon, I am in my craft room while hubs takes a nap. I am looking out he window for spring, but will be disappointed. It is going to rain shortly, then turn into snow...actually as I begin write this I am seeing flakes, not rain.  I wonder what that'll do the the 3-6 in snow projections?  So I am taking some time to just play in challenges, have not had time this week to just play, everything has been homework.

Warning, this is a longer than usual post, several challenges on one post a total of  5 cards.

When I read about this challenge, I immediately thought of a piece of paper that had been included in my Simon Says Stamp February Stamp kit.  Its is a lovely watercolor-like thunderstorm is coming grayness.

 I paired it with my one and only Casual Fridays stamp set Big Thanks along with some Hero Arts silver embossing powder.
 
I love the look and it is perfect for Casual Friday's  Shades of Gray.


My next card is for Shopping our Stash #142 Sentiments only.  I have a new Hero Arts sentiment stamp that is HUGE, and is perfect for this challenge.  I really shopped my stash on this one; my stash of card kits.  I really don't have that many, but I take them out of the box and store each one is a 6X9 inch zip-lock type bag. Most of the papers are 6x6, but I cut about an inch off one side so they will fit inside.  The 8-1/2 by 11 are cut to make card bases 4 1/4 inches wide so they fit nicely too. The point being I have lots of 1 inch strips of patterned papers.  These particular ones are from the Simon Says Stamp February kit, as is the card base.  The matting paper and the sentiment were stamped on paper in the August 2012 kit also from SSS.


I just had fun laying those strips down, I didn't plan, just cut some thinner, and then laid them out as I grabbed them -no thinking, no considering, just fun.  I think the background turned out just fine, and makes a great backdrop for that fun sentiment stamp!
Grab Our Badge!


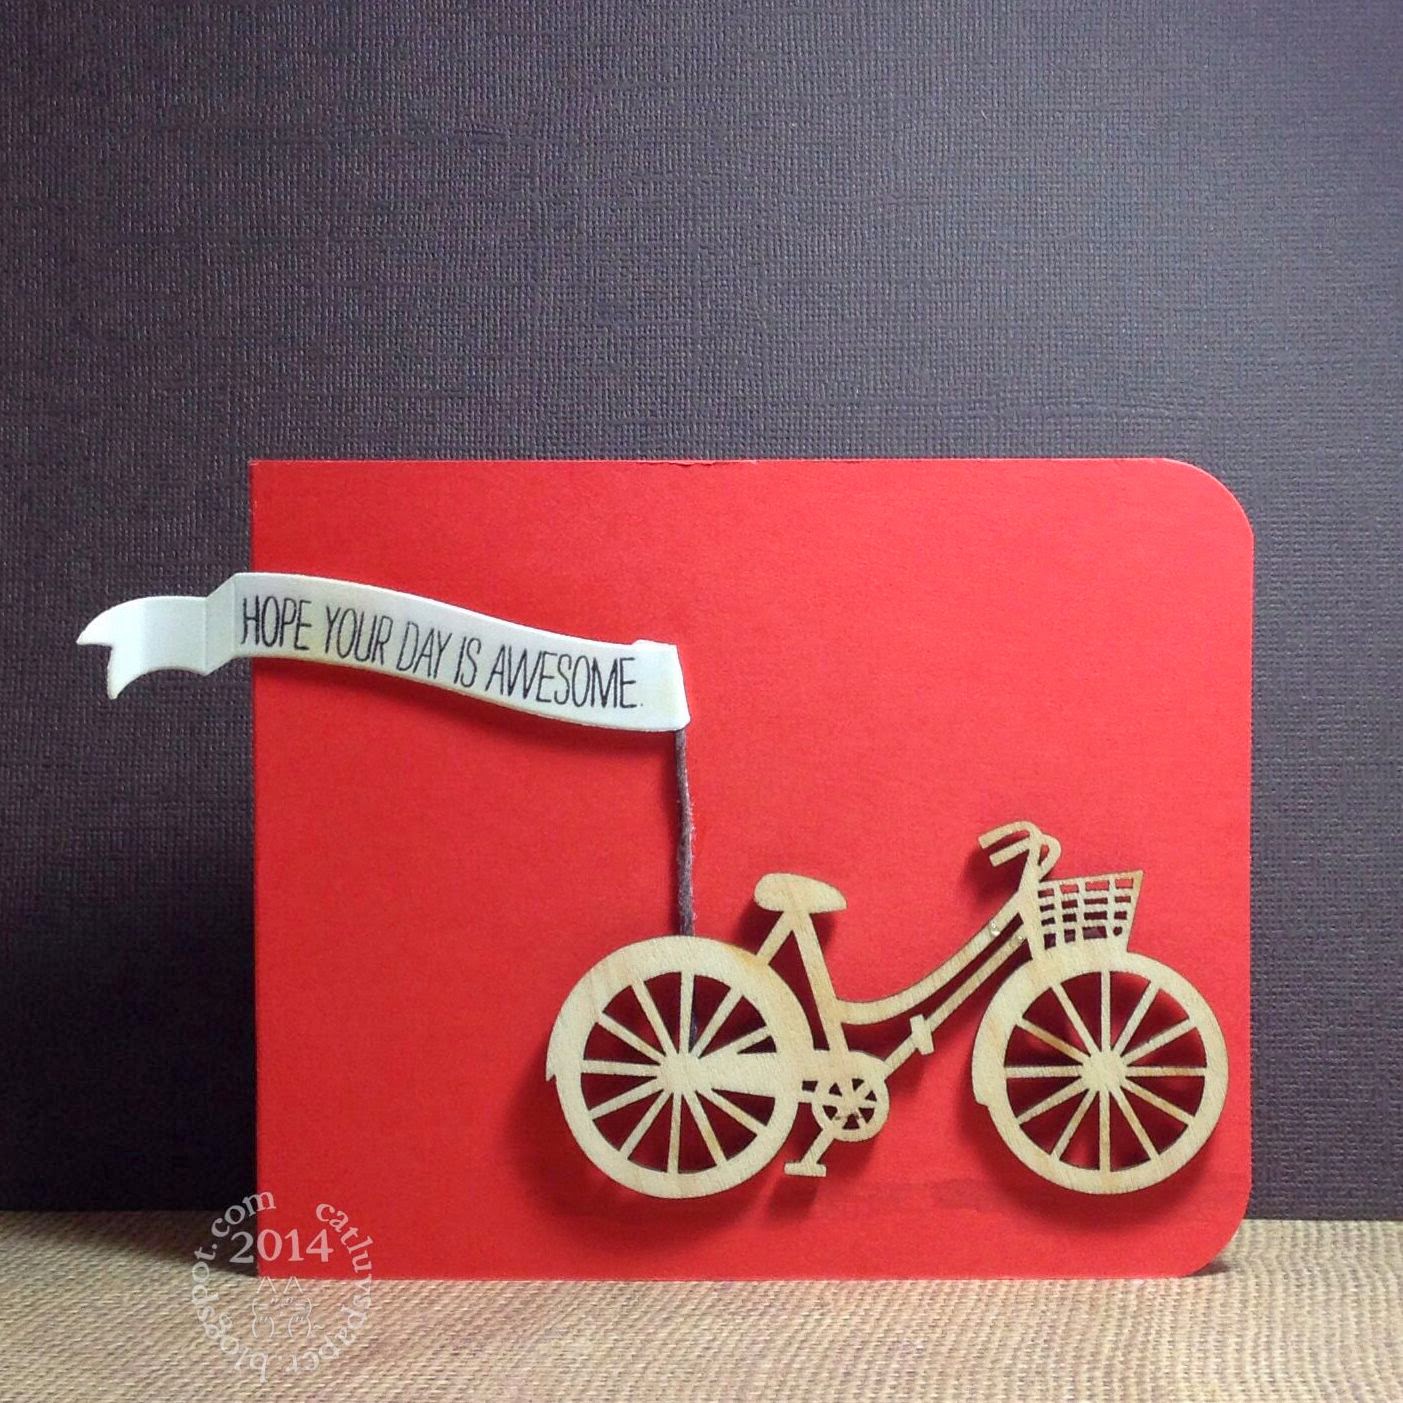
My last challenge card to share today is for Muse#58 based on the inspiration from Muse Theresa Calvrid. I had a wood veneer bicycle and some red card stock, I thought back to my childhood and how I loved those tall banner holding bike poles, they made the most wonderful noise flapping behind you when riding very fast!


Muse- Theresa Calvrid


My last two cards were sent out to family for St. Patrick's Day. The die cuts are from Paper Smooches as is the second's card's sentiment. The embossing folder is Darice, and the sentiment on the first card is from Stamps of Life. Have a wonderful week, I will be back Tuesday with more homework!


 Thanks for stopping by.

Graffiiti Stamping

Back with another card from Days 5 & 6 of  Clean and Simple 3, One Layer Cards.

http://www.onlinecardclasses.com/CS3/wp-content/uploads/2014/02/CS3_paticipant.pngThis one is based on Shari Carroll's  sample of a die cut word with phrases stamped over and around it for a stacked graffiti look.

 I used Hero Arts Shadow inks in Mint Julep, Charcoal, and Tide Pool.  The die sentiment is also from Hero Arts as are two of the phrases - CL487 Thank you for being my Friend, CL759 Enjoy Today. The remaining phrases are from Paper Smooches  Sentiment Sampler, Casual Fridays Big Thanks, Simon Says Stamp Tilted Banner Sayings.


Thanks for stopping by!

Saturday, March 15, 2014

Iron it off!

http://www.onlinecardclasses.com/CS3/wp-content/uploads/2014/02/CS3_paticipant.pngMy first card for our lessons on days 5 and 6 entitled Backgrounds into the Foreground uses emboss resist to create the background, and then the embossing is ironed off so that none of the shine remains. It is a cool way to create a patterned piece.

I chose the Hero Arts Square Pattern Background CG458, and embossed it with clear powder using versamark ink. Then I applied distress inks in Squeezed Lemonade, Spiced Marmalade, and Peacock Feathers to the unembossed areas using a waterbrush.  Then the iron came out (gotta use it for something).

Applying heat with a paper barrier between the iron and the embossed piece removed all the embossing leaving a matte cardstock piece with the coloring intact.  I applied a bold sentiment, that pattern is bold so it needed a statement, from Technique Tuesday called Incredible.


Thanks for stopping by, I will have one more homework item today, but first I must make dinner.

Friday, March 14, 2014

Masking

http://www.onlinecardclasses.com/CS3/wp-content/uploads/2014/02/CS3_paticipant.pngAnother  homework piece. I am often all thumbs when it comes to stamping cute little images to make a patten or a pleasing arrangement...but this masking technique...it might solve my placement issues.

I created the mask using two spellbinder dies on masking paper.  I placed the outer portion and the inner portion of the mask down, and began adding my leaves, flowers, and finally filler dots. I stamped my sentiment last, with the help of a stamp positioner. I am enjoying this masked look.


All inks were Hero Arts - Bubblegum, Butterbar, Green Hills, Navy
Stamp Hero Arts  CG351 Just Because.
Edited to add...the flowers and bits and leaves are from the Mama Elephant set Waterblooms.
Thanks for stopping by!

Stamp Layering

http://www.onlinecardclasses.com/CS3/wp-content/uploads/2014/02/CS3_paticipant.pngI did buckle down and do some homework without going off on a tangent.  I am passing on the "Scenic Stamping", but I am giving the Stamp Layering a try.

I had to get creative, I don't have a lot of varied sized smooth circle stamps, so I used the non stamping side of some round stamps. I still struggle with that freehand placement of smaller images.


Supplies:
Versafine-Black Onyx Ink
Neenah Aspen White 120# paper
Hero Arts Inks-Soft Sand, Pale Tomato, Soft Pool, Cornflower, Green Hills
Hero Arts Stamps-CL544 Big Ticket, CL614 Best of the best (used the back sides), CG516 Number Pattern


Thursday, March 13, 2014

On the way to a one layer card

I so veered off course!  I was working on a card for my class homework.  The card type was building a scene using a foreground and background image to simulate distance. I cut my watercolor paper; happily applied lots of inks making a beautiful background for my images...I stamped the images and then, I realized I was way way way off of my homework assignment. Oh well!


I had cut my watercolor paper to act as a panel on a card before ever inking it. I mounted said panel, and them placed it on a card base...DEFINITELY NOT A ONE LAYER CARD.  Oh well, I was so pleased with the panel I finished the card with some dry embossing and a layered sentiment.

I am going to link this up to Virginia's View - Watercolor Challenge.

Thanks so much for stopping by, I will go back to homework and will have another post later tonight.

Stamps - Wetlands- Stampin Up
Paper - Stampin Up, Shiny Scraps, Strathmore Watercolor
Inks- Distress, Versafine
Embossing Folder - Sizzix

Wednesday, March 12, 2014

Faux Metal

I like the coin effects realized by multiple layers of metalic embossing.  A "coin"  results when several layers of metallic embossing is pressed in with a smaller stamp. This is my last card for the first two day's of Online Card Classes Clean and Simple 3 - One Layer Cards.
http://www.onlinecardclasses.com/CS3/wp-content/uploads/2014/02/CS3_paticipant.png
I tried making this card several times, but I have such a hard time with building up a background with single stamps.  In any case, I am showing this simply for the gold "heart" coins.  Thanks for stopping by.


Faux Letterpress

Hello Again! Here is my second card for the Clean & Simple 3 One layer Cards lessons on Faux Effects.


I have one more card to make for the Faux Effects lessons.   Lessons run through March 21st, and the class and galleries close on March 28th.

http://www.onlinecardclasses.com/CS3/wp-content/uploads/2014/02/CS3_paticipant.png


Thanks for stopping by!

Tuesday, March 11, 2014

Get Ready...

for me to share my homework with you. I am addicted to these Online Card Classes, and have signed up for the latest offering Clean & Simple 3 one layer cards. There is still time to register and play along. The best thing about these classes is the fact that you have lifetime access to the materials. You can download the videos and pdf sheets if you wish., or simply log back in and view everything online. I keep binders with my class projects attached to each class day's lessons printed.

http://www.onlinecardclasses.com/CS3/wp-content/uploads/2014/02/CS3_paticipant.png 

I will likely have several posts every few days, with a single post for each card.  Our first lessons day 1 and day 2 cover faux effects.  My first card has many "layers" but, since they are inlaid to one another the card remains flat, but is full of interest. 

I don't really have word dies that lend themselves well to this method.  I really had to sit and think and picture how to accomplish what I wanted to create. I probably made it harder on myself than I needed to, but it was fun, and I succeeded in creating the card that was in my head.


Since I chose a darker card base, I had to line it in white for easier message writing inside and that liner piece was perfect to hold all the bits and pieces in place to make this a perfectly flat card. The Hearts and Large Label piece are from Spellbinders.  The Always die and sentiment are from Simon Says Stamp. The color spritzes are from Heidi Swap and Luminart. Embossing powder in white from Hero Arts, along with their white Unicorn pigment ink. Card size is 4x4 inches.

Thanks for stopping by, off to make dinner...then it is back to the craft table.

Monday, March 10, 2014

Neutrals plus at least 3 colors

On Saturday, I had a marathon card-making day.  

Four cards, in one day for me is a lot when they are each different and I have to THINK.  

I did however take time out to play in another scramble at the Hero Arts Flickr group. Heather Maria gave us the option of making a card, atc, bookmark, art piece that met the requirements of being mostly Neutral but having AT LEAST 3 or more colors added.  

I had to sit and think for a while, and clean up my work space from the previous card I'd made and left while hubs and I went for a walk an hour before the scramble.


I decided neutral would be kraft, with some clear embossing of the wonderful Leafy Vine stamp from Hero Arts.  Then for my color, what better than a butterfly...but no ordinary butterfly...a very brightly colored one. After coloring the butterfly with copics, I heat embossed it with clear powder 3 times. It really made the colors pop and shine. I did get a bit of glare while photographing (sorry).

I think I got this posted with 10 minutes to spare from the 90 of the challenge. Whew!  I couldn't bear to make my butterfly compete with a sentiment, so it's going to be a note card.  Thanks for stopping by!

Saturday, March 8, 2014

Brown, Green and White Part 2


I have another 3 cards for the Card Concept Challenge.  I have tried to make a card for each concept.  

I have to admit it was tough. The colors are not among my favorite colors, but if I could create 6 cards of differing styles - wow growth in my card making abilities.  There is still time to play...link closes on 3-17-14.


Shabby Chic

Elegant

Freestyle Collage
 Thanks so much for stopping by!